Showing posts with label Christmas. Show all posts

Wednesday, December 31, 2014

Nutella Snowflake Coffee Cake


So I came across this Braided Nutella Bread on Pinterest that I just had to try it. It was surprisingly easy, but I found the dough a bit tough and bland. So I followed the technique, but used a variation on  a coffee cake recipe that I use in my bread machine. End result - cute and tasty!  So here is my version of the Nutella Snowflake Coffee Cake!

Nutella Snowflake Coffee Cake

Dough:
In your bread machine, put the following ingredients, and mix using the dough cycle according to your machine directions.  (If you don't have a bread machine, use either the dough hooks on your mixer or blend and then knead by hand.)  
2 1/2 cups regular flour
1/4 cup butter, softened and cut into one inch squares
1/4 cup sugar
1/4 cup sour cream
1/2 cup warm water
1/2 teaspoon salt
1 1/2 teaspoons quick rising yeast (be sure it is fresh!)
I always check the bread machine while it is mixing. I like the dough to stay fairly soft, so if it seems dry add a bit more water a teaspoon at a time. Let the dough rise for a couple hours, or until about doubled.
When done, remove the dough, divide in half, and form into two balls.  Let it rest about 10 minutes.  Then roll the dough into two 12 inch circles.  Cover a round pizza pan with a parchment paper circle and set the first dough circle on top.

Spread the first circle with Nutella (I used Trader Joe's Cocoa Almond Spread) up to about a half inch of the edge of the dough.

Top with the second circle of dough.  Pinch the edges together - you can brush the inside edges with a bit of water if it isn't sticking together. I lightly pressed a glass on top to mark the center. Then I sliced the dough into 16 pieces - first halves, then quarters, then eighths, then sixteenths - it helps to keep the slices the same size.  

Take two pieces and twist them towards each other.  I think I did 3 twists each time. It was actually quite easy to do this.

Repeat all the way around. Then let rise until about doubled, about another hour or so.
Bake in a preheated 350 degree oven for about 15 to 30 minutes.  My oven actually died in the midst of baking these for my neighbors, so I ended up going to a friend's house to finish them. So the temperature or the time may be slightly off, so watch closely and adjust according to your oven.  Cover the top with foil if it seems to be browning too quickly.

Let it totally cool.  Doesn't it look cute??

I drizzled it with a glaze made of powdered sugar, milk, and a little melted butter before wrapping it up for delivery to my neighbors.


This recipe is definitely a keeper. Next time (after I get a new oven), I may try it with butter, nuts, and cinnamon sugar. Not sure if the snowflake design will be as obvious as with the Nutella, but worth a try.

Vintage Christmas


Before the season is over, just wanted to share a few ways that I used vintage items in my Christmas decorating.  After the epic flooding in my basement this summer, I lost a lot of my Christmas decorations. It forces me to take a fresh look at some the the things that I still had and see what I could do with them!


A friend gave me this old coffee pot when cleaning out her parents' home. A perfect spot to "plant" a little Christmas tree. Next year I will try a real mini one and see if the cats will leave it alone.


A bare spot on the wall where I hung my childhood plaid lunch box.


So obsessed with bottle brush trees. I picked up a package of them at Joann's last year post Christmas and scattered them everywhere. I like the look of this one perched on an upside down tea cup.


More trees and a snowman caught in a mason jar. (Made the snowman years ago, one of the few of my snowman collection that survived the flood.)


I had to toss all the Christmas wreaths that were stored in the basement. Here is a new one I put together using some thrift store sweaters I had stashed away and and some vintage buttons.


I sadly lost most of my vintage ornaments from my grandmother - the water melted the paint right of the them. Wish I hadn't tossed them and kept them as a plain silver color, but was so overwhelmed at the time with trying to save things.  A few were left, and I went out this December to antique stories to try to replace a some of them with some similar ornaments. Put them in a bowl under a tinsel tree.


I added a few red dishes from the dollar store to my stack of blue dishes. The mason jar has a solar light top that I discovered at Michaels - I'm definitely getting more of them!


I also bought a bunch of these cute little frames at Michaels at their dollar spot.  My brother recently scanned all of our family slides, so I added a few photos from when we kids. Will do more of these for next year. 


A few years ago I made some faux mercury class candle holders out of thrift store dished.  Mixed them with a pretty door knob. Put a few bottle brush trees in bleach to turn them white. One of my cats loves playing with these trees and I keep finding them on the floor, thus the wonky shape.


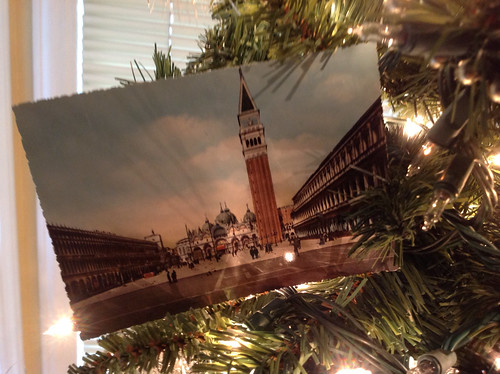
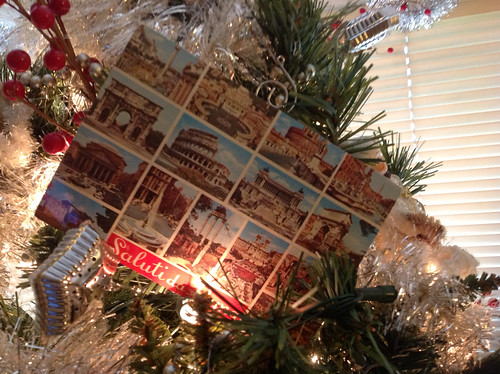
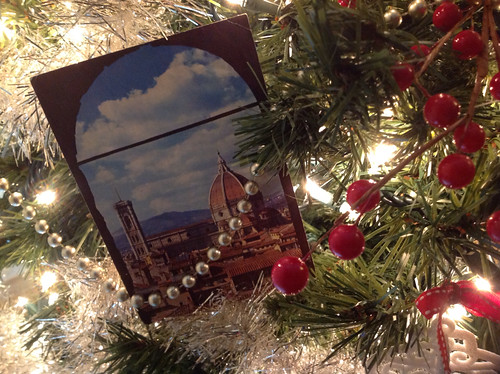
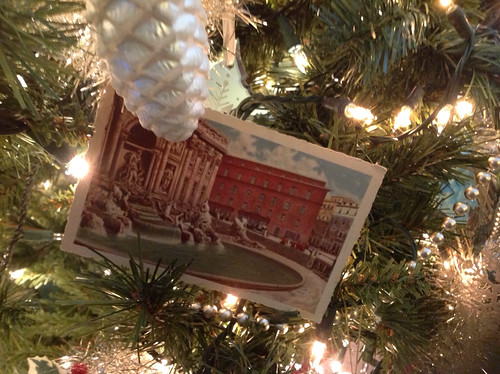
More vintage postcards. Twisted wire as holders in a salt shaker and in a door knob.

And speaking of cats, they did much better this year at staying out of the Christmas tree (at least while I was watching) but they still both had to check it out when I first put it up.

I hope your Christmas was wonderful! God's blessings to all!


Saturday, December 15, 2012

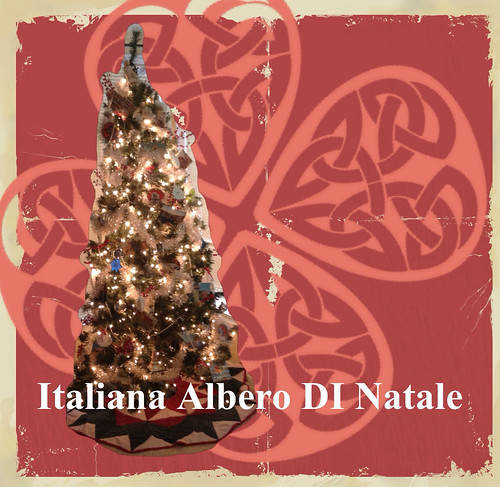
Italiana Albero DI Natale


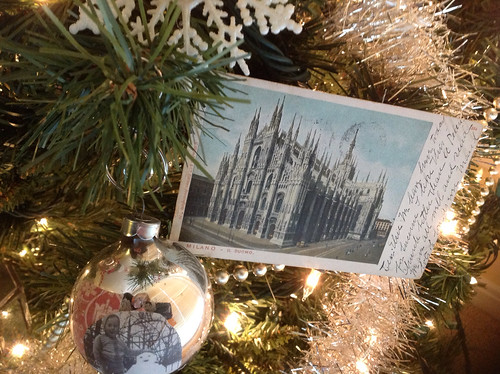
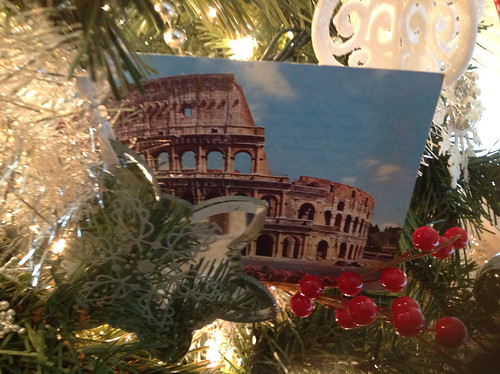
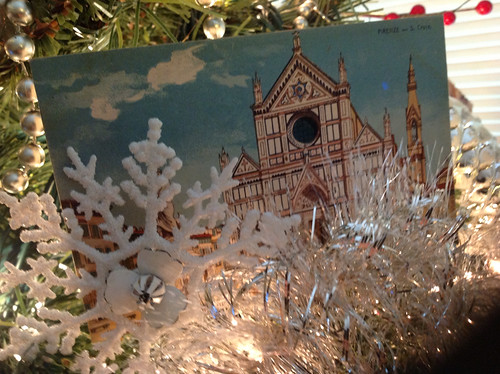
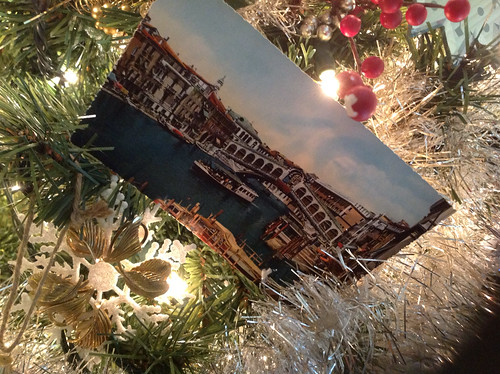
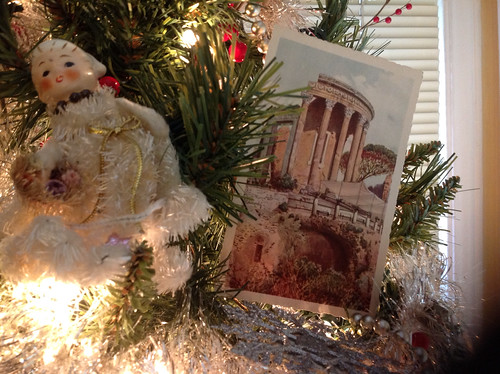
When I finished decorating my Christmas tree last week, it just seemed blah.  So I gathered a stash of vintage postcards from Italy that I collected after my trip last summer and tucked them into the branches.


Seeing these pictures of all the lovely places that I visited during the summer makes me smile every time I look at the tree.
A friend gave me this cute passport ornament that goes perfectly with the postcards!


Thursday, December 22, 2011

Reese's Peanut Butter Banana Bread


This is a recipe that I found via Pinterest. I started using Pinterest to look for art projects for school, but recently I am finding many other fun and distracting items on it. (Here is my Pinterest page if you are interested in checking it out or following me. But please do not blame me if you become addicted - I have given you fair warning!) Anyway, when I saw this recipe from the Cookies & Cups blog, I knew it would be a great recipe for a Christmas gift!

My first problem when making this recipe was that my bananas weren't ripe! So I googled it, and found the hint to stick the bananas in a 350 degree oven for about 15 minutes to blacken them. Worked like a charm!


My twist on this recipe from the original was to bake it into cute little ceramic pans! I bought the ones that I used here at Michaels a few years ago, but they had them this year as well. They are on sale this week for 49 cents each, but a lot of stores are sold out of them, I discovered.

I must confess, that I started sampling the bread warm from the oven, and before I knew it, I almost had one mini loaf devoured. I did save the other 3 loafs for gifts and plan to make another batch tomorrow.


Reese's Peanut Butter Banana Bread

Ingredients:

3 ripe bananas, mashed
1/2 cup smooth peanut butter
1/4 cup canola oil
1 egg
1/2 cup granulated sugar
1/4 cup brown sugar
1 1/2 cups all purpose flour
1/2 teaspoon baking soda
1 1/2 teaspoon baking powder
1/2 teaspoon salt
8 oz bag of Reese's Mini Peanut Butter Cups


Directions

1. Preheat oven to 350 degrees.
2. Spray 4 ceramic mini loaf pans (or one regular sized loaf pan) with cooking spray.
3. Combine flour, baking powder, baking soda, and salt in a medium sized bowl.
4. In a large bowl, blend together the ripe bananas, peanut butter, oil, eggs, and brown and white sugar.
5. Stir the dry ingredients into the wet ingredients until just combined. The batter will be lumpy.
6. Fold the peanut butter cups gently into the batter.
7. Divide the batter between the 4 mini pans. Set the pans on a cookie sheet to make it easier to put into the oven.
8. Bake for 30 - 35 minutes or until a toothpick stuck into the center comes out clean. (A individual large loaf may take up to an hour.)
9. Let cool completely, then cover in plastic wrap. I added a ribbon around the center to make it extra festive as a gift!


Wednesday, December 21, 2011

Faux Mercury Glass Candlesticks


I like the look of mercury glass - for the past few years I have been looking for some mercury glass candlesticks in the half off sales after Christmas with no luck. So I decided to do some googling on how to create faux mercury glass to see if I could create my own. I wasn't able to find the Krylon Looking Glass spray paint that most of the tutorials recommended. So here's the method that I came up with. I did some trial and error first on some glass jars before I made the actual candle sticks.

First I purchased a few clear glass pieces (a couple of goblets, a glass, a candy tray, and something that might be an ashtray) at the goodwill store for a dollar or two, as well as a couple of clear glass votives at Michaels for 99 cents. (Way too many trips to Michaels this week!)


I used Valspar silver brilliant metal (found at Lowes) as well as a bit of Krylon paint in antique bronze (which you really don't need). You also need a spray bottle with water. Rubber gloves are also helpful!
I lightly sprayed the inside of the glass with a bit of water. Then a very, very light spritz of the antique bronze on the inside. And then a light spray of the Valspar brilliant silver metal paint on the inside. I let that dry for a bit, but I wasn't happy with the look, so I did a very light spray of the Valspar silver on the outside as well. Hold the can at least 12 inches away for best effect. If you spray it too heavily the candlelight will not shine through the glass. Let dry completely overnight.

Once dried, I hot glued two pieces together to create a base and a stand. I know the hot glue is just temporary - what I need to do is use epoxy, but I was in a hurry.


I'm pretty happy with the end result, especially when the candlelight shines though! Not bad for $10 worth of glass and the cost of the spray paint.


Tuesday, December 20, 2011

Silver Glitter Snowflakes


Last year I had a lot of fun making these white snowflakes with vintage earrings. This year I took some of the same plastic snowflakes from Michaels and sprayed them silver. While still wet, I sprinkled them with a bit of Martha Stewart antique silver glitter.

I used various punches to cut shapes out of vintage dictionary paper. I stained the edges with a brown stamp and added a bit more brown color to the edges to age the paper. Then I dug into my stash to find some interesting things to decorate the centers.

Plastic swan with a button. I think I got this swan in a package from a family that I stayed with in Russia on a church choir tour. It had a vintage look, even though it was plastic, so I have kept it in my stash. I think it works perfect on this ornament!

Silver button on top of a mother of pearl button.

Giant pearly clip on earring on top of silver jewelry filigree.

Small silver key with button on top. (Bland key and plastic button, but looks cute combined together!)

Plastic crown - I think this came in a bag of junk jewelry!

All of these are now on my Christmas tree, but I think they would make great decorations for packages, too!

LinkWithin

Blog Widget by LinkWithin