Saturday, November 29, 2008
Sweet Potato Cloverleaf Rolls
I've been on a roll this week - haha - with all these roll recipes! Here's one more to end the week!
A few days ago Sandi from Piecemeal Quilts left a comment about my roll recipe and mentioned that she likes to make sweet potato rolls. (Thanks, Sandi, for sending me your recipe.) That sounded interesting and I happened to have a sweet potato on hand to experiment. I took the recipe for Anne's Potato Rolls and substituted sweet potato.
The taste is pretty similar to the original recipe, but the color is what makes these unique. They come out with a pretty golden orange tint. I made them into cloverleaf rolls, which I thought worked nicely. Next time I might experiment with adding some herbs - what do you think would work with sweet potato?
Sweet Potato Cloverleaf Rolls
1 sweet potato
1/2 cup milk
1/4 cup butter
1/8 cup sugar
1/2 teaspoon salt
1 package yeast (regular or quick rise)
1/2 cup water
3 cups bread flour
1 Tablespoon chopped fresh rosemary
Poke the sweet potato all over with a fork. Bake in your microwave at high for 2 or 3 minutes. Let cool, then remove the potato from the skin. Use a fork to smash it up! You should have about a 1/2 cup.
Scald the milk. Add the butter, sugar, and salt. When the butter has melted, wisk the mixture until combined. Add the potato and blend together. I then used my mini food processor to puree the mixture until smooth - I'm not sure if this is necessary or not.
Add the flour, 1/2 cup water, and potato mixture into the pan of the bread machine. Put the yeast in the yeast dispenser. Set the machine to the dough cycle and run according to your machine's directions. While the dough is being mixed, check it. It should be soft and slightly sticky; add a touch more water if if seems stiff. . Let the dough rise in the bread machine.
Remove the dough from the machine and put on a lightly floured surface. Separate it into 16 pieces. Then divide each piece into three balls. Place 3 balls into each greased muffin cup. Cover and let the rolls rise until almost doubled.
Bake in a preheated oven at 375 degrees for about 15 - 17 minutes.. Upon removing from the oven, gently remove from the pan and let cool. Brush the tops with butter if desired!
Thursday, November 27, 2008
Unexpected Thanksgiving
Thanksgiving turned out not to be what I had expected and planned. This morning as I was getting ready to pack my my car to head over the river and through the woods to spend the weekend with my family, I got a call from my Dad saying that everyone had come down with the stomach flu and that I better not make the trip. This is the first time in my life I have not spent Thanksgiving with my family.
So I unexpectedly have a free weekend. And 6 dozen or so homemade rolls and muffins (and no freezer space to store them)!
Actually, I was able to enjoy a meal with a friend's family this afternoon. And went out to a movie with a friend this evening. And I am looking forward to 3 unexpected days at home. I hope to get a jump on my Christmas decorating and even have some time to make some clever projects! And I'll likely eat some of those homemade rolls, too. I wish you all could help me out!
So it was not my traditional Thanksgiving. But it was a good Thanksgiving none the less. I am thankful for food and friends and God's many blessings.
Portuguese Sweet Rolls - A Thanksgiving Tradition
This is my "signature" bread recipe. I found the recipe in the newspaper years ago and I have tweaked it over the years for the bread machine. It has a slightly sweet lemony flavor somewhat like those "Hawaiian Rolls" that you can buy at the store, only better! It is my tradition to make these rolls every Thanksgiving - it just wouldn't be Thanksgiving without them!
As you celebrate this Thanksgiving, may you truly be reminded of God's blessings and mercy. Have a wonderful day filled with food, family, and fun.
Portuguese Sweet Rolls
1/3 cup boiling water
1/8 cup instant mashed potatoes
1/3 cup sugar
1/8 cup dried milk
1/4 cup butter
2 3/4 cups flour
1/2 cup water, minus 1 Tablespoon
1 egg
1/2 teaspoon salt
1/4 teaspoon lemon extract
1/8 teaspoon vanilla extract
1 package quick rise yeast
1. In a saucepan, boil the water. Add the mashed potato flakes, sugar, dried milk, and butter. Wisk together until the butter is melted.
2. Put the flour, egg, salt, lemon and vanilla extract, and water in the bread machine pan. Add the potato mixture on top. Put the yeast in the dispenser and set the bread machine to run on the dough cycle. While the dough is mixing, check it - the dough should be soft, add a little water more water if needed.
3. Remove the dough when risen at the end of the cycle. Put it on a lightly floured surface and punch it down. Let it rest for 5 - 10 minutes while covered lightly with plastic wrap or a towel.
4. Roll the dough out into a rectangle about 10 x 18 inches. Cut the dough into long strips 10 inches long.
Roll the dough into spirals and use a dab of water to seal the tail end of the dough. Place on a lightly greased baking sheet.
5. Cover the rolls with plastic wrap (so it doesn't stick) and then with a towel. Let rise for 1 - 2 hours, or until almost doubled. Bake at 350 degrees for about 15/20 minutes or until golden brown. Remove and cool on a wire rack. Brush tops with melted butter if desired.
Wednesday, November 26, 2008
Cranberry Orange Pecan Muffins
I've made these muffins for Thanksgiving for many years. The cranberries seem so "Thanksgiviny" (is there such a word?) and I like the orange flavor and the crunch of the pecans. Add some streusel on top - a taste to feel truly thankful for!
Here's my best tip for muffin making for Thanksgiving - make some mini muffins! Everyone seems to go for the minis, they can have a little taste without totally blowing the diet!
Cranberry Orange Pecan Muffins
Streusel Topping (could omit if desired, but why would you want to?)
2 Tablespoons softened butter
2 Tablespoons flour
2 Tablespoons sugar
1 Tablespoon brown sugar
3 Tablespoons chopped pecans
Combine the first 4 ingredients in a small bowl. Cut them into small pieces using a pastry blender or fork. Add the pecans and set aside.
Muffins
1 cup chopped fresh or frozen cranberries
3/4 cup sugar (divided)
zest of one orange
2 cups flour
2 teaspoons baking powder
1/2 teaspoon salt
1/2 cup canola oil
1/2 cup orange juice (I use the juice from the orange after I zest it)
2 large eggs
1/2 cup chopped pecans
1. Preheat oven to 375 degrees. Grease muffin pans with cooking spray.
2. In a small bowl, combine the chopped cranberries, 1/4 cup of the sugar, and the orange peel. Set aside.
3. In a large bowl, combine flour, remaining 1/2 cup sugar, the baking powder, and the salt. In a large glass measuring cup, blend the oil, orange juice, and eggs. Pour all at once the wet ingredients into the dry ingredients and stir until just combined. Gently fold in the cranberries and pecans.
4. Spoon the batter into the muffin pan. (I usually can make 12 minis and 9 full sized muffins). Bake the minis for 15/20 minutes and the full sized muffins for 20/25 minutes or until golden and a toothpick put in the center comes out clean. Let the muffins cool in the pan for about 10 minutes before removing.
Monday, November 24, 2008
Rosemary Potato Rolls
I wrote about Anne's Potato Rolls last summer, but for Thanksgiving I do a variation of them using fresh rosemary. They have a savory flavor that blends nicely with the harvest flavors of a Thanksgiving dinner.
Rosemary Potato Rolls
1/2 cup mashed potato flakes
1/2 cup milk
1/4 cup butter
1/4 cup sugar
1/2 teaspoon salt
1 package yeast (regular or quick rise)
1/2 cup water
3 cups bread flour
1 Tablespoon chopped fresh rosemary
Scald the milk. Add the potato flakes, butter, sugar, and salt. When the butter has melted, wisk the mixture until combined.
Add the flour, 1/2 cup water, and potato mixture into the pan of the bread machine. Put the yeast in the yeast dispenser. Set the machine to the dough cycle and run according to your machine's directions. While the dough is being mixed, check it. It should be soft and slightly sticky; add a touch more water if if seems stiff. About half way through the kneading cycle add the rosemary. Let the dough rise in the bread machine.
Remove the dough from the machine and put on a lightly floured surface. Separate it into 9 balls. Place in a greased 8 inch square glass pan. Cover and let the rolls rise until almost doubled.
Bake in a preheated oven at 375 degrees for about 15 - 17 minutes. I usually bake on a lower shelf in the oven, or else the tops will brown too quickly and insides will still be doughy. (Cover the top with foil if it is browning too quickly.) The bottoms should be slightly golden brown. Upon removing from the oven, flip out of the pan and let cool. Brush the tops with butter if desired!
Sunday, November 23, 2008
Parmesan Pesto Pinwheels
Well, I'm on a roll. A roll baking frenzy that is. My contribution to the Thanksgiving meal has traditionally been homemade rolls. I started bringing rolls many years ago. I think I was asked to bring rolls for the meal because they thought they were being nice to me. Rolls were easy - just pick up a few packages at the store.
But I am a good baker. And being the cooking overachiever that I am, I brought homemade rolls. And of course the homemade rolls were a hit. And once you have homemade rolls, you can't good back to some dry old store bought ones! And thus the roll baking tradition was born!
I usually spend most of the Wednesday before vacation making rolls and muffins. But I got a little head start on this batch of Parmesan Pesto Pinwheels this weekend which I stuck in the freezer for Thursday. This recipe is an invention of my own using dough from a favorite breadstick recipe.
Parmesan Pesto Pinwheels
3 cups bread flour
1 teaspoon salt
1 Tablespoon sugar
2 Tablespoons butter
3 Tablespoons nonfat dried milk
1 cup water
1 1/2 rapid rise/bread yeast
1/3 cup pesto
1/3 cup Parmesan cheese
Combine flour, salt, sugar, butter, nonfat dried milk, and water in your bread machine and the yeast in the dispenser, and mix according to your manufacturers directions. Let rise.
Remove the risen dough from the machine and put on a floured surface. Roll the dough into a rectangle about 10 x 18 inches. Spread the pesto on the top of the dough and sprinkle with Parmesan cheese. (I usually don't measure the exact amount.)
Roll the dough tightly, starting on the 18 inch side, so that you have a long tube. Slice the dough into 3/4 inch wide slices.
I usually use an ungreased airbake ccokie sheet to bake these because the bottoms tend to burn on a regular baking sheet. Bake at 400 degrees for 10 to 15 minutes, watching that the bottoms get a slight crisp from the cheese and pesto, but be careful that they do not burn.
Brush the tops with melted butter while warm.
Monday, November 17, 2008
Vintage Yellow Sheets 2
Here is the end result of my little vintage sheet project - a small quilt top that I can use as a table topper. It measures about 18 inches across.
It still isn't quilted yet - I think that will have to wait until after Christmas.
I like the cheerful combo of colors. It is a splash of spring color on a cold gray November day.
Sunday, November 16, 2008
Vintage Yellow Sheets
About a year or so ago I started seeing some neat quilting and sewing projects popping up in blogs and in Flickr where people were using old colored sheets for the fabric.I loved the pastel sherbet colors combinations and I'm a sucker for vintage floral fabric. So every so often I've been stopping at the Salvation Army and picking up any cool colored sheets and pillowcases that they. I've been accumulating a little stash. Here is my collection of yellows:
So what to do with the fabric? I finally decided to do a little project just to see how the colors looked when combined together. It was somewhat traumatic to cut into those huge untouched sheets and pillowcases, and especially difficult to navigate the fitted sheets!
I cut strips one and a half inches wide....
sewed them together into long strips...
Stay tuned - next post I'll show you what I've made out of them.
Friday, November 14, 2008
Pizza Papalis
Are you thick or thin? In regards to pizza crust that is??
I like both, but I think thick cheesy Chicago style pizza is my favorite. In Detroit, probably the best known place to get Chicago style pizza is Pizza Papalis. We used to go all the way down to Greektown to get it, but now there are smaller branches of this restaurant scattered around the metro area where you can get take out (and a few booths to eat in). They have a large menu with all kinds of sandwiches, ribs, and even an excellent thin crusted pizza. But the deep dish pizza is what they are famous for.
Now I seldom indulge in this pizza. All that cheese....not healthy.....but oh so good. And it is pricey - over $20 for a small pizza. But it is 2 inches thick and weighs about 3 pounds and one slice is more than enough for a serving. So sometimes it is a very special treat after a hard week.
My favorite is the seafood pizza. It is very rich, but I love it. And this time I ordered it with "lite" cheese in an attempt to be a bit more healthy. It is made with a fairly thin crust which has a nice crisp texture on the outside edge. Inside is a ton of cheese and the toppings. And then over the top is another crust and a delicious chunky tomato sauce. When you pull out a slice, you get a wonderful endless strings of cheese. Mmmmm, so satisfying...
Thick or thin? How about you?
Tuesday, November 11, 2008
Tribute to the Greatest Generation
On Saturday I was listening to The Vinyl Cafe from CBC radio while running some errands. They were talking about the upcoming Veteran's Day holiday and sharing some wonderful stories that got me feeling a bit teared up. It got me thinking about my father who was wounded in combat while serving in Italy during WWII.
A number of years ago I sent my father a copy of Tom Brokow's The Greatest Generation as a birthday gift. He usually doesn't read a lot of books, but he just couldn't put this one down. It seemed to open up a flood of memories for him and he started sharing all kinds of stories from his war experience. At one point, I said to my Dad, "You really should write these stories down!" I was quite surprised to find that he actually took my suggestion and started recording his memories on a yellow legal pad.
When he finished, I typed out his story, printed it out, and put it in a binder. I inserted scanned images of pictures, documents, and his medals and made a cover. I know this is something that he treasures, and since then I have printed numerous copies that he has shared with others.
So this is my clever suggestion for Veteran's Day - if you want a great gift for someone in your family, use digital tools to turn their special memories into some kind of document!
Sunday, November 9, 2008
Broccoli Slaw
Several years ago at Thanksgiving my step brother Chris was putting together this broccoli slaw recipe. I had never seen this shredded broccoli and I thought it sounded pretty strange, but when I tried it, I changed my mind. What a great way to get some healthy vegetables! I like the sweet and tangy dressing and the crunchy toppings.
If I am just making this for myself, I keep the dressing a bottle in the refrigerator, and I add some dressing and toppings to a single serving just before eating so that it doesn't lose the crunch.
Broccoli Slaw
1 package broccoli slaw
5 green onions, thinly sliced
1/2 cup sunflower oil
1 1/2 teaspoon soy sauce
1/2 cup sugar
1/4 cup white vinegar
3/4 cup sliced almonds
1/2 cup sunflower seeds
1 can rice noodles.
Combine the broccoli slaw and green onions in a bowl.
Mix the oil, soy sauce, sugar, and vinegar in a jar and shake until dissolved to make the dressing.
Just before serving, stir in the almonds, sunflower seeds, and rice noodles. Toss with the dressing.
Note: The original recipe also called for 3 stalks of thinly sliced celery. I often omit it because I don't want to buy a whole bunch of celery just for this recipe! Also, I've used canola or peanut oil instead of the sunflower oil.
Saturday, November 8, 2008
Trader Joe Treasure - Grilled Chicken with Tortellini and Sun Dried Tomatoes
One of my favorite products from Trader Joes is this Grilled Chicken Tortellini. Chicken strips, sun dried tomatoes, and tortellini stuffed with cheese coated with a nice olive oil seasoned with Italian herbs. It tastes great heated or even cold! I usually keep a package in the freezer to use when I need a quick meal.
I usually add some Kalamata olives and some shredded cheese. I can get 2, maybe three meals out of a package. Here it is packed up for my lunch. I've also served this for company - I boought a couple packages, added another package of grilled chicken strips from Trader Joes and some extra tomatoes and olives. A classy yummy meal for little effort!
Wednesday, November 5, 2008
Christine's Cuisine
Christine's Cuisine is a little diner in a strip mall on Nine Mile in Ferndale. The inside is long and narrow and tiny with shiny metal walls. It is the perfect place to go when you are craving some comfort food or some home cooking. My friend Gail introduced me to this place a few years ago for my birthday and we went back there last week.
The menu includes a variety of sandwiches and salads for lunch. Dinner entrees include Eastern European foods like pierogies and potato pancakes. There also are pastas, chicken, and ribs. Main course come with either homemade soup or a salad.
There usually are several daily specials. Gail ordered a pork tenderloin dish with a chipolte salsa (I think it was mango). I had a bite and it was good.
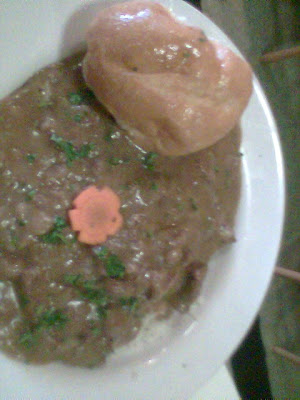
I ordered the Beef Burgundy. (Often I get this or the Beef Stroganoff.) I don't eat beef very often, but this is pure comfort food for me - rich and thick and meaty. None of this is particularly "pretty" looking food, but it does fill you up!
There is a display case as you walk in that will tempt you with a view of the homemade goodies. We were so full we had to pass on the dessert, but it is worth saving room if you can.
And the price is very reasonable - many entrees are around 10 dollars, including the 2 beef dishes I mentioned. One word of caution - they don't accept credit cards - so be sure to bring cash!
Sunday, November 2, 2008
Chicken and Green Apple Curry
Yesterday I was looking for a recipe in one of my MANY folders filled with recipe clippings and I came across a curry recipe with the word "good!" scribbled above it. It came from a Cooking Light magazine that was at least 15 years old and that's probably how long it had been since I made it. It just sounded like the perfect kind of recipe to make on a gray afternoon, so I made it for my Sunday dinner.
I really like the slightly sweet taste of the green apple and raisins and the mild taste of curry. I adapted the original recipe, adding red peppers and using chicken breasts rather than canned chicken. I definitely won't wait 15 years to make this one again.
Chicken and Green Apple Curry
1 lb. chicken breasts, cut in 1 inch chunks (I used 3 half breasts)
2 teaspoons corn starch
olive oil
salt and pepper
1 Granny Smith apple, unpeeled and cut in chunks
1 medium onion, chopped
1 red pepper, chopped
1/4 cup golden raisins
2 teaspoons curry powder
1/2 teaspoon tumeric
1 teaspoon sugar
1 (22 1/2 ounce) can diced tomatoes
1. Mix chicken breast pieces with corn starch, salt, and pepper, and set aside.
2. Heat a little olive oil in a large skillet and add the onion, red pepper, and apple. Cook for about 5 minutes, then remove from the pan and set aside.
3. Add a bit more oil into the pan, and cook the chicken until browned on all sides.
Then stir in the curry, tumeric, sugar, tomatoes and raisins. Add the onion, apple, pepper mixture back into the pan and simmer for another 5 to 7 minutes.
Serve over rice. Makes 4 servings.
Subscribe to:
Posts (Atom)