Wednesday, November 27, 2013

Caramel Apple Muffins

Have you discovered these Kraft Caramel Bits yet?  I hate unwrapping caramels for recipes, so these are simply genius! The only bad thing about them is that since they are unwrapped, it is just too easy to keep popping them in your mouth.


I was looking for a new twist on apple muffins for Thanksgiving, so I did a Pinterest search for caramel apple muffins.  I came up with quite a few matches, and decided to use this recipe from My Recipes as my base, but instead of dipping the muffins in caramel after they were cooled, I just added some of the caramel bits into the batter.

The sour cream made these muffins moist and tender and that little bit of melted caramel inside adds just a touch of extra goodness.  You could definitely make them without the caramel bits and they would still be amazing.  I think next time I may play around with the topping - it may have needed a bit more flour.  The topping got a bit sticky and toffee-like, not sure if that was a good thing or a dare to lose a filling!


Caramel Apple Muffins

Topping:


1/3 cup light brown sugar
1 1/2 tablespoons all-purpose flour (next time I will try 2 tablespoons)
1/4 teaspoon ground cinnamon
1 1/2 softened tablespoons butter

In a small bowl, stir together the brown sugar, flour, and cinnamon.  Cut the butter in with a fork or pastry blender into small bits.  Set aside.


Muffins:


1 cup sour cream (8 ounces) - I used low fat
1 cup sugar
2 large eggs
1 tablespoon vanilla
2 cups all-purpose flour
2 teaspoons baking powder
1/2 teaspoon baking soda
1/2 teaspoon salt
2 cups peeled and diced apples - I used Gala apples
3/4 cup Kraft Caramel Bits

1.  Preheat oven to 375 degrees.

2. In a large bowl, beat sour cream. sugar, eggs, and vanilla for about a half minute or until blended.

3. In another bowl, stir together flour, baking powder, baking soda, and salt.  Slowly add into the wet mixture and beat until just blended. Stir in the chopped apples and the caramel bits.

4. Spoon 3/4 full into a muffin pan that has been greased with cooking spray.  (I was able to get a dozen full sized muffins and a dozen mini muffins out of this recipe.)  Sprinkle with the topping.  Bake for about 20 minutes for the full sized and 15 minutes for the minis, or until golden and a toothpick stuck in the center comes out clean.  (I usually check them every 5 minutes once they start to brown to be sure!)

5. Remove immediately from the pan (the caramel can cause them to stick once cooled) and let cool on a baking rack.


Sunday, October 20, 2013

Visual Notetaking with the Flipink app


Last summer while at the Apple Distinguished Educator conference, I was inspired by the visual notes taken by ADE Brad Ovenell-Carter. Although I am no great artist, I thought it looked like fun. I have been using the past few weeks in church to make attempts to begin to develop my skills with this interesting and creative form of note taking. Yes, I am drawing in church, just like I used to do as a kid, only this time with a purpose and on an iPad!

I have tested out several different apps. Paper53 seems to be the favorite of most people who do visual note taking, but I have had difficulty using their "undo" and "zoom" features, so although I love the way my stylus responds on my iPad surface while using this app, it is not my first choice. I've also used Sketchbook X and Adobe Ideas which are both free and have good features and some things I don't like. (Paper53 is free, but you really need to do the in app purchase to unlock the tools and ability to blend color, which currently would cost you about $10.)

I've ended up mostly using the FlipInk app. The price currently is $1.99 which is a good value. I like that I can create notebooks similar to Paper53. It includes a grid that can be used as a background, which is helpful for a novice like me. It has pencil, eraser, crayon, ink, marker, and paint brush tools and you can vary the width and transparency of the tools which is a feature not available in Paper53. You pinch to zoom in and slide two fingers horizontally to undo. Color selection is done by a familiar color wheel tool. It also allows you to add a photo or text box which sometimes is a nice addition. The one thing I don't particularly like is the look of the "ink" - it doesn't seem to have the "flow" effect that other apps have.

I've purchased several new styluses through Amazon which have helped with the process. At school, I have inexpensive styluses that we use, but I felt I needed some better tools to help with the fine work. I especially LOVE the Sensu Brush - it is just like using a paintbrush on the iPad. Here are links to some of the items I've purchased:

Inexpensive Stylus - for student use
Adonit Jot Pro Stylus - for fine lines, writing
Sensu Brush - amazing brush that works on the iPad!
Sensu Solo Brush - another less expensive option (I have not tried it)
Here are a few more of my visual notes. The one at the bottom is my first attempt, so hopefully you can see some progress in my skills over the past few weeks.


I've so enjoyed experimenting with this process. I find it keeps my mind engaged while I listen and the process of trying to capture the notes visually allows me to organize and find fresh connections. If you are the type who likes to doodle, why don't you give it a try??


This one above was done with Paper53.


(This one was done with Adobe Ideas and was my first attempt.)

Thursday, September 5, 2013

Honey Whole Wheat Pizza Crust


I think I have finally come up with a rustic pizza crust that I like a lot!  I am posting this recipe so I don't forget what I did.  Here is a slice topped with apple butter and caramelized onions, kalamata olives, goat cheese, pecans, and fresh rosemary.

Honey Whole Wheat Pizza Crust

2 cups unbleached regular flour
3/4 cup whole wheat flour
1 cup water
2 teaspoons honey
2 tablespoons olive oil
1 1/2 teaspoon cider vinegar
1 teaspoon kosher salt
1 1/2 teaspoon quick rise yeast

I mixed the dough in my bread machine and let it rise for 2 hours.  You could also knead by hand or in a food processor, but I still love the bread machine because it takes 2 minutes to toss in the ingredients and it does all the work and keeps it at the perfect temperature to rise.

Divide into 2 sections and let rest 10 minutes.  Then roll out thin as possible on a floured surface.  

After adding toppings, I baked on a pizza stone in a very hot 500 degree plus oven for about 8 minutes.     (Preheat the oven/pizza stone for at least 30 minutes so it is very hot.)


Monday, September 2, 2013

Jay Bosch's World War II History

To celebrate my father's 88th birthday today I have published his war memoirs in a free multitouch book on iTunes! Here is the story of the book:

About 10 years ago I encouraged my father to write out his memories of his service and being wounded in Italy during World War II. I typed and printed out his "book" and later self published it on Lulu. I recently realized I should put his book in digital form onto his beloved iPad so he could share it with others (since he takes his iPad with him almost everywhere he goes).

After the Apple Distinguished Educator conference in Austin this summer, it dawned on me that I should give my dad's story a larger audience (much as I do for my students) by publishing it on iTunes. I realized I could easily transform the text and photos that I already had into a pretty cool multitouch book using iBooks Author. I included photos of artifacts that he had saved from Italy and filmed a few new video interviews to enhance the text. I also experimented with using Hyperstudio Author to build an interactive widget showing his medals and patches.

I am so excited to be able to give this book to my dad as a birthday present.  Please share the link with anyone interested in a primary source first person account of World War II or who is interested in seeing what can be done in iBooks Author.


Here is the link where you can download the book onto your iPad for free:  https://itunes.apple.com/us/book/jay-boschs-world-war-ii-history/id683470567?mt=11

Daycation


A last hurrah before school starts in earnest.  I decided to take a little daycation road trip an hour up north and do a little recreational shopping.  First stop was Great Lakes Crossing.  I had a $5 coupon from Eddie Bauer and I always enjoy the challenge of seeing what I can get for really cheap.  Found these two blouses on the $4.99 rack - originally $59 dollars (although we all know those prices at outlets can be pretty inflated).  I discovered that Eddie Bauer gives a 10% discount with teacher ID - never knew that, weeping at all the $$ I could have saved over the years!  With my discount and coupon, these 2 items cost under five dollars.  SCORE!


Then headed up to Clarkston.  I have always wanted to try out the Clarkston Union restaurant that I have heard so much about.  An old church repurposed into a cool restaurant.


I just grabbed a quick sandwich while sitting at the bar.  Got a pecan cherry sausage smothered with mushrooms and onions.  That sausage slid right off the bun after one bite - had to resort to cutting it up in pieces to eat!  The grilled onions underneath were pretty good, too.  Next time, though, going for their famous mac and cheese!


I stopped at the gift shop next store and grabbed a couple cupcakes for to take home for dessert.  I seriously think these are the best cupcakes ever!  I am a frosting freak and these had a mound of buttery frosting.  I tried the raspberry one that had a great raspberry filling and a blueberry one with an almond cream frosting.  I would make the trip again just to get these cupcakes! 


Then on to downtown Holly.  I don't think I have been there in many years and had forgotten how cute it is.  There are several really interesting gift shops on the main street.  My favorite was called Pigeon in the Parlour - just loved how all the items were displayed!


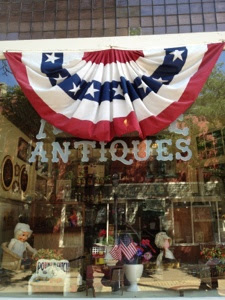
I did some antiquing - there are several great stores to explore. 


I always love Battle Alley Arcade Antiques - it is divided into cute little rooms that are fun to wander through.   

I bought a few vintage hankies and 2 wire locker baskets that I plan to use for storage.  I'd been looking for wire baskets for a while - really liked the number tags and the diamond pattern that the wires make.


Friday, August 30, 2013

Be Thou My Vision


It is back to school time for me.  Recently at church we sang my favorite hymn "Be Thou My Vision." It was a good reminder as I start a new year to keep God first and foremost in everything I do and plan as I teach.  I adopted the phrase as my theme for the new year and made a "chalkboard" style poster to put in my classroom as a reminder.  (Click on the image above for a larger version - it is free for your personal use.)


Another phrase from the hymn is "Naught be all else to me, save that thou art."  I know all the "thous" are old fashioned, but sometimes I think it is a good poetic way to remind myself to reverence God.


As my last little creative fling of the summer, I made a soldered charm using the two images and wore it on the first day of school.  I really love how this turned out - hopefully can try it again with some other phrases.


Sunday, August 18, 2013

Bucharest Grill


On Friday, I headed to downtown Detroit to go to the Tigers game.  We went down a bit early and grabbed a bite at the Bucharest Grill which is located just a couple blocks from Comerica Park.


I'd heard about this place from others, so I was excited to give it a try.  You order at the counter and they bring your order to your table.  (They also do a lot of take out traffic.)  The inside is open and industrial.  We had a great table by a window where we could people watch everyone heading to the game.


The menu has a variety of middle eastern foods and their speciality is the schawarma sandwiches.  Here is my chicken schawarma - it was huge, a good 3+ inches wide, filled with really tasty chicken, tomato, lettuce, and tangy garlic sauce. (I left off the pickle.)  We had a big order of curly fries that we shared and were very full when done.

Bucharest Grill is located at 2040 Park Ave and a great place to stop on the way to a game or the Fox Theater.


Thursday, August 15, 2013

Key & Star Necklace


A simple necklace with a long antique gold chain with a few fancy flowers, combined with a skeleton key and sparkly star charm.


Antique photo effect via the free Miracam app.


Tuesday, August 6, 2013

Vintage Tablecloth Bed Canopy


So I had a little fun last week creating a canopy for my bed out of two vintage tablecloths.  I thought it turned out rather cute!


I was inspired by this display at Ikea.  I have the same bed and loved how they draped the fabric to make a simply canopy.


I sewed two tablecloths together.  I took the fringe off of an old chenille bedspread that I had cut up for other projects and basted that onto one edge.  I used inexpensive curtain rods from Ikea and pipe clamps.


The ceiling is slanted where the wall paper starts.  Simply tucked the clamp in behind the paneling here without a screw.  Next summer hope to take down the wallpaper and paint the pinewood paneling white.


I added old white shutters on each side.  I recently bought matching night stands from Meijers which flank each side of the bed.


And a few of my key necklaces hanging on the shutters.


Another look - the pillows are also vintage hankies and fabrics.

Monday, July 29, 2013

Trader Joe's Mixed Berry Scones


These are crazy easy and very good!

2/3 cup water. Mix with a fork.  Drop onto cookie sheet lined with parchment paper. (I sprinkled tops with some pearl sugar.).  Bake 15 minutes.  Yummy warm!  It looks like you fussed when you didn't!  


Thursday, July 25, 2013

Things I bought at IKEA that I really Didn't Need


I know you've done it too, so don't judge me!


Blue and white dishes - to add to my collection, can't resist any blue and white dish!

During the summer, I plan one trip to Ikea just for fun.  Usually I have a list of things I am looking for, but typically end up with things that are completely different, just because they are cute and such good prices.  I try to go right at 10 am when they open - great parking, no crowds, and this time no line to check out!


White enamel colander - only $9.99, will use for fruit.


Cobalt blue serving bowls - $1.99, will go great with blue and white dishes!


Small Ribba frames with mats, price recently reduced to $1.99.  Have a clever project in mind for this!


Scented candles in glass holders - only $1.99!


Actually bought some of these lacy metal candle holders last spring, but picked up a couple more for outside because they make such a great light pattern in the dark!


Cute pillow, but really doesn't match the couch, might return.


These stencil stickers because....


I want to do this to an old dresser!


I've been trying to find a new bolster pillow for months.  This is a new addition at Ikea - think I bling it up a bit with some vintage fabric!

I didn't find the kind of shelves that I was looking for, but just had fun looking around.


Wednesday, July 24, 2013

Chalkboard Door


I've recently done some painting in my dining room.  One of the changes that I made was to change an ugly brown door to the upstairs into a chalkboard door.  Below is a "before" picture of the door.


 I used Valspar chalkboard paint that I purchased at Lowes.  I first put multiple coats of Rustoleum Magnetic Paint as a base.  I never could get the magnetic paint to really work - after about 4 coats it would hold a very light magnet, but not a piece of paper under the magnet.  It also left a very rough surface for the chalkboard paint.  This week I added several more coats of the magnetic paint and sanded it smooth, but most magnets still aren't sticking.  Then I covered it with another coat of chalkboard paint.  The chalkboard paint works great, so my advice is to skip the magnetic paint!


Anyone who knows me knows I love all things Apple, so this was my first drawing!


Today I made this inspirational message.   It's not perfect, but I love it!
I love having the challenge of coming up with ideas that will inspire and encourage me.


Here's a little closeup - I did get a few vintage button magnets to stick, so I used them as "dots" to embellish the drawing.

I've been somewhat obsessed recently with all the clever ways people are creating chalkboards.  If you want to see some more ideas, check out my Pinterest Chalkboard board!


- Posted using BlogPress from my iPhone

LinkWithin

Blog Widget by LinkWithin