1. Select the picture (or multiple pictures while holding down the apple or shift key).
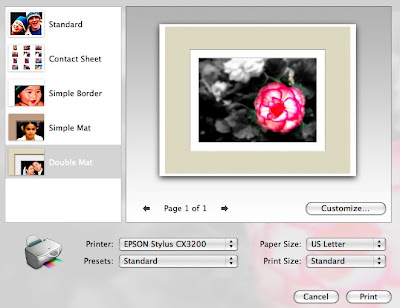
2. Select Print. A print menu that looks something like this should come up:

Here you can select the size of the prints and also choose if you want to add a mat onto the picture. I like the double mats!
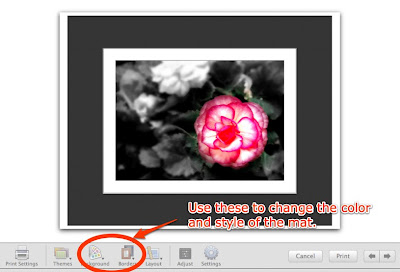
Then, if you click "Customize" you can change colors and features of the mats. It will look something like this:

There are a lot of options for customizing the color and design of the mat. When you are done, simply click print! That's it!
I use this feature in school to print digital pictures which the students have taken. It adds such a professional touch to their photography! You also could add scanned artwork and then print the picture with a mat on it.
If you have iPhoto, but never explored it much, be sure to check out the features that allow you to create calendars, cards, and books. You can print these things out yourself - you do not need to order them. However, if you do order them through Apple, they are beautiful! (See my iPhoto book here.)

2 comments:
Thanks for your instructions. I think you must have a newer version of iPhoto than we do. I still can't find it and when I print my window looks completely different. I'm heading out the door now to a wedding tonight so I'll look into it more later.
Ann
Yes, it is a new feature in iPhoto 08. I should have mentioned that - I am going to edit the post right now. Thanks. Sorry it won't work!
Post a Comment